.svg)
.svg)
.svg)
.svg)
.svg)
.svg)
.svg)
.svg)
.svg)


.svg)
.svg)
.svg)
.svg)
.svg)
.svg)
.svg)
.svg)

.svg)
.svg)
.svg)

.svg)

.svg)
.svg)
.svg)
.svg)
.svg)


.svg)
.svg)
.svg)
.svg)
.svg)
.svg)
.svg)





.svg)


_4x.webp)
%20(1).png)

A clear event budget helps you make confident spending decisions, avoid last-minute financial panic, and understand exactly how much you raised for your mission.
With the right structure, key benchmarks, and a free downloadable template, you can map out every dollar before you spend it and track expenses in real time.
Below, we'll cover what to include in your event budget, how to build it around your revenue goal, and how to calculate ROI so you can plan smarter and improve future events. Plus, you'll get a free downloadable template to jumpstart your tracking.
Key takeaways
- Event budgeting is essential 💸 Event budgets aren't just a plan for spending funds. They're a framework to ensure your event is financially viable and meets or exceeds your fundraising goals.
- Start with your revenue goal 🎯 Begin with your targeted fundraising goal and work backward to calculate what you can afford to spend on event planning.
- Keep expenses at 35% or less 📉 Only spend up to 35% of your total revenue goal on event costs. If you can keep it to 25% or less, even better.
- Always add a buffer 🔒 Build a 10–15% contingency into your budget so surprises don't derail your event.
- Track expenses in real time 📊 Compare your actual expenses to your projected ones as you go to prevent overspending.
- Free tools save thousands 🧈 Givebutter's fundraising, ticketing, and event check-in tools are free, helping you keep more revenue for your mission.
Download your free nonprofit event budget template
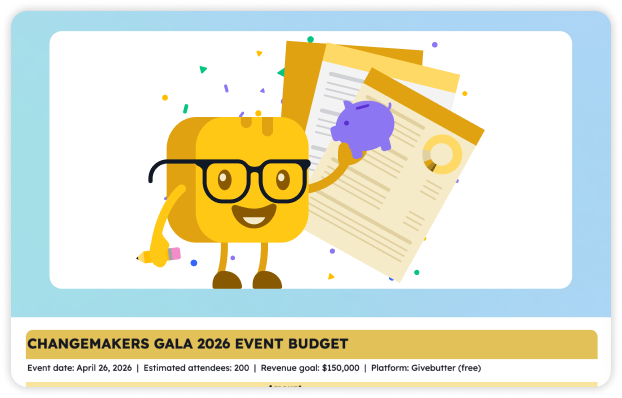
Download this free, customizable template with built-in formulas to compare your projected budget to actual spending.
Simply enter your expense and revenue totals in the custom fields to easily create a budget that keeps your event financially on track and helps you exceed your fundraising goals.
Why your nonprofit needs an event budget
A strong event budget ensures you don't overspend, keeps your event profitable, and aligns your spending with your fundraising goal. Without one, it's easy to lose track of costs or feel like your event is spiraling out of control.
The numbers are encouraging: 77% of nonprofits that hosted a fundraiser in 2025 met or exceeded their fundraising goals. With the right tools and a solid budget template, you can set your event up for the same success.
With real-time tracking built in, you'll have a clean financial overview ready for board reporting before the event is even over.
Key event budget categories to include
We've broken down the most common event budget categories to help you make informed decisions as you build your budget and allocate funds.
Venue & space 🏰
Depending on your event type, your venue is likely to be your largest expense, especially if you're hosting a formal gala event. Many nonprofits spend 20–50% of their event budget on venue costs.
Food & beverage 😋
After the venue, catering is usually the next largest expense. This can include meals, beverages, or service fees, which can add up quickly.
For clarity, it's often helpful to separate food and beverage expenses from catering expenses in your budget.
Entertainment & programming 🎤
This encompasses speaker fees and entertainment, such as musicians, DJs, or other performers you include in your event.
Marketing & promotion 📣
Your marketing budget covers how you promote your event to potential attendees, from digital advertising and email campaigns to print materials and graphic design.
Technology & platform fees 💻
Technology costs for fundraising events typically include your fundraising platform, ticketing, registration, and livestream tools, along with any AV needs from your venue.
Some platforms charge monthly or per-transaction fees, so it's important to factor those in early. Platforms like Givebutter offer core event tools for free, which can significantly reduce expenses.
Decor & supplies 🎈
This category includes table settings, balloons, signage, and any DIY decorations. Consider these costs when selecting your venue, since some spaces require more decorating than others.
Staffing & labor 🫡
Volunteers often fill roles like event check-in or information stations, but many events still require paid staff, such as security, bartenders, or auctioneers.
Permits, licenses & insurance 🗒️
Some events require permitting, licensing, or insurance. If you're hosting a fun run or raffle, for example, you'll likely need to secure a permit for your route or raffle license.
If you're hosting an event where liability may be an issue, like a marathon, concert, or sports-based event, be sure to speak with an insurance professional to make sure you have the right coverage.
Transportation or parking 🚌
If your event is in a remote location, you may need to factor in transportation costs or cover parking permit fees.
Miscellaneous & contingency ⚠️
Every event is different, and sometimes you'll need to budget for miscellaneous items like volunteer t-shirts, background checks, or extra equipment.
How to build your event budget (step-by-step)
An effective budget starts with your revenue goal, not guesswork. From there, you can map out expenses, track your ROI, and make informed decisions. This budget outline will help you think strategically about your event spending at every step.
Step 1: Set your fundraising revenue goal 🎯
Start by setting your revenue goal. Tie it to a real nonprofit need to keep your planning focused.
Enter your total goal into the top row of your template, then add projected revenue streams, including:
- Ticket sales
- Sponsorships
- Auction
- Paddle raise
- Donations
- Merchandise
🎬 See it in action: If your revenue goal is $150K to fund a new building for your nonprofit, you might project $60K from ticket sales, $40K from sponsorships, $35K from a live auction, and $15K from a paddle raise.
Step 2: Determine your maximum allowable expenses (the 35% rule) 🧮
Now that you've determined your total revenue goal and how this breaks down into different streams, it's time to calculate your expenses. The rule of thumb is to keep your expenses equal to, or less than, 35% of your revenue goal.
Once you've calculated this 35%, treat it as your maximum spending ceiling, not your target. If you can keep your event total to around 25% of your total revenue, you'll be setting yourself up for a stronger ROI.
Here's a simple formula:
Maximum expenses = revenue goal x 0.35
🎬 See it in action: If your total revenue goal is $150K, your total spending shouldn't exceed $52.5K ($150K x 0.35 = $52K).
Step 3: Estimate attendance & cost per attendee 👥
More attendees can increase funds raised, but they can also increase expenses. Start by estimating your headcount, then divide your total projected expenses by your headcount to calculate your cost per attendee.
This number helps you evaluate ticket pricing, set fundraising targets, and make sure your event will generate a meaningful return. If your ticket price is lower than your cost per attendee, you'll need to make up the difference through sponsorships, donations, or auction revenue.
🎬 See it in action: If you're expecting 200 attendees and your total projected expenses are $33,800, your cost per attendee is $169.

Step 4: Build out your expense categories 🧱
Now, map your expenses beneath the revenue section in the template. Aim for realistic numbers based on vendor quotes or past events whenever possible.
Allocate costs until you hit your expense ceiling, but don't exceed it. Give yourself an additional buffer by using estimates that represent the upper limits of your vendor quotes. For example, if a caterer quotes $8K to $12K, put $12K in your budget.
Step 5: Add a 10–15% contingency buffer 🛡️
Unexpected costs happen, especially for first-time events. Some examples include:
- Service fees & taxes 🪩 Some vendors exclude service fees or taxes from initial quotes. Avoid this hidden cost by confirming with vendors when you receive an estimate.
- Last-minute rentals 🎤 Extra tables, tents, or AV rentals are common last-minute expenses.
- Extra staff hours ⌚ If setup runs long or your event requires additional support, staffing costs can increase quickly.
On the final line of your expense section, calculate 10–15% of your total expenses and add it as a buffer. Make sure this stays within your overall spending ceiling.
Here's an easy formula you can use:
Contingency = total projected expenses × 0.10–0.15
🎬 See it in action: If your total projected expenses are $15K, your contingency buffer should be $1.5K to $2.25K.
💡 Pro tip: Unexpected costs can derail your budget quickly, so always include a contingency buffer to avoid unnecessary stress.
Step 6: Set up budget vs. actual tracking columns 📊
Track your actual expenses beside your projected expenses for easy comparison. The difference between these two figures is called variance.
Here's the simple calculation:
Variance = actual – budgeted
💡 Pro tip: Your Givebutter budget template automatically calculates variances, so you can quickly determine whether you're going over budget or if you have additional funds to allocate to other categories.
Step 7: Calculate projected & final event ROI 📈
Once your event is finished, compare your total revenue and expenses to calculate your final ROI. This figure helps you evaluate your event's success and decide whether you should repeat or refine your strategy for future events.
An ROI of 200% or higher is considered strong for a fundraising event. If you don't quite hit this benchmark, review your budget to find where you can cut costs next time or try a lower-cost fundraising event.
Calculate your ROI with this formula:
ROI = (net profit ÷ total expenses) x 100
🎬 See it in action: If your net profit was $100K, and your expenses were $50K, your ROI is 200%.
Make your event budget go further with Givebutter
A strong event budget helps you make confident planning decisions, stay on track, and reach your fundraising goals.
With Givebutter, you can manage ticketing, donations, auction revenue, and event expenses in one place, so calculating ROI at the end of your event takes minutes, not days. And because Givebutter's core event tools are free, you can reduce costs without sacrificing functionality.

Host your most profitable fundraising event yet
Sign up for Givebutter and use your new budget template to start raising more for your mission.
FAQs about nonprofit event budgets
What is the best event budget template?
The best fundraising event budget template includes built-in sections for revenue streams, expense categories, and variance tracking.
Givebutter's free, downloadable event budget template has everything in one place and is fully customizable for any event. Simply download, make a copy, and start plugging in your numbers.
How to create a simple event budget template in Excel?
Start by creating sections for projected revenue (ticket sales, donations, sponsorships) and expenses (venue, catering, entertainment, etc.). Add a column for actual expenses and a variance column to calculate the difference.
If you'd rather customize a template than start from scratch, Givebutter's free event budget template has everything you need to get started quickly.
What should be included in an event budget?
An event budget should include all projected revenue and expenses. Add a column to track your actual expenses in real time, along with a column that automatically calculates the variance between what you budgeted and what you actually spent.
What percentage of event revenue should go to expenses?
According to Charity Watch, a helpful guideline is to keep event expenses at or below 35% of total revenue. For stronger returns, aim for closer to 25%.
How do you calculate event ROI?
Use this formula: ROI = (net revenue ÷ total expenses) x 100.
For example, if your net profit was $100K and your expenses were $50K, your ROI is 200%. Anything at or above 200% is generally considered strong for a fundraising event.
Share this article









.svg)
.svg)